Blog – Cards Masonry Full Screen

Waxing Your Eyebrows at Home

Waxing typically involves spreading a sticky and viscous substance over an area to remove hairs. It is allowed to harden then it is quickly torn off.

Waxing is a cheap, quick, and effective way to remove hair, but it might cause some pain.

It can keep unwanted strands from growing for up to six to eight weeks. The new hair is often much finer than the one plucked before.

Contents

Use Hair Removal Waxing Kits for a Quick and Easy Procedure

Waxing kits are great for home use as it includes all that you need for hair removal. These kits also have instructions on how to apply the waxes. For home eyebrow hair removal, you can try hard or sugar wax kits.

These are some examples that are gentle to the skin and are excellent for home usage. These waxes are also easy to clean, which makes the hair removal process a breeze.

Before Waxing, Clean and Use Powder for Your Skin

Cleaning and powdering your face before using the waxing kit is strongly recommended. Washing your face removes any oil and dead skin buildup on your eyebrows. After cleaning, powdering your face helps prevent moisture from the skin, making sure that the wax grabs onto the hair strand easily.

Applying The Wax Correctly

Apply the wax strip in the same direction where the strand grows. If you are using hard wax, use a thick application, let it harden, use one hand to make the skin taut, and quickly tear the strip off.

Moisturize After Waxing

You must now moisturize the waxed area as the skin is inflamed from the hair removal. You will notice a slight redness on the skin, but it will gradually fade away. Moisturize the area properly so that it will rehydrate and heal properly.

How to Remove Eyebrow Hair

Removing excess eyebrow hair not only helps frame your face in the most flattering way possible but also gives an instant boost to your confidence.

Whether you prefer waxing, tweezing, threading or laser removal, plenty of options are available. We’ll cover each method in detail so you can decide which suits your needs the best.

Contents

Preparing The Eyebrow Area

Although it may seem intimidating to remove eyebrow hair, the process is actually quite simple. With a few basic tools and some patience, you can achieve salon-level results at home.

Preparing the area before you start plucking or waxing is key for avoiding any pain or damage.

First of all, wash your face with lukewarm water and gently pat dry with a soft towel. This should help open up the pores so that removing the strands will be less painful. You’ll also want to avoid putting moisturizer on beforehand, as this could make it harder to grip the hair.

Once your skin has been cleansed, use an astringent to help minimize inflammation while keeping bacteria away from the follicles. Finally, take a small brush and comb through each brow to separate individual hairs. By taking these preparatory steps before starting your hair removal routine, you’re guaranteed a smoother experience with better results.

Tweezing Eyebrow Hair

Tweezing is a great option for removing eyebrow hair. It’s the most common method used to shape and maintain eyebrows, as it removes single hairs at once.

Tweezers come in different sizes and shapes. They can be bought from any drug store, beauty supply shop or online retailer.

To prepare, comb the eyebrow hairs upwards so you can see which ones need to be removed.

To begin tweezing, hold the tweezers parallel to your natural brow line and pluck out excess hairs one by one in their direction of growth. Take care not to pull too hard on the skin while doing this. Instead, grip only onto each individual hair without pinching your skin.

After completing one side of your eyebrows, move onto the other side using the same technique until all unwanted hairs are gone. If redness occurs after tweezing, apply some aloe vera gel or witch hazel tonic directly onto the area to reduce inflammation and speed up healing time.

When finished, avoid touching or rubbing your eyebrows as this could cause irritation and infection—and enjoy your newly-shaped brows!

Waxing Eyebrow Hair

Waxing eyebrow hair is a great way to remove unwanted hairs quickly and efficiently. It involves using warm wax to pull the hairs out from the root, leaving your brows looking smooth and tidy.

Although it can be slightly more painful than tweezing, it’s an effective method for removing multiple hairs at once.

The key to successful waxing is preparation. Make sure you have clean skin and that any makeup has been removed before beginning. You may also want to take ibuprofen or another pain reliever prior to waxing if you’re concerned about discomfort.

Once everything is ready, apply the wax in small strips along each side of your eyebrows, following their natural shape as much as possible.

The wax should remain on your skin for several seconds before being pulled off with one swift motion—pull away against the direction of hair growth for best results!

With continued use over time, you’ll find that your remaining eyebrow hairs become thinner and finer, making them easier to remove or even just leave alone entirely.

Threading Eyebrow Hair

Threading eyebrow hair is quickly becoming the method of choice for many people. Threading offers a gentler approach to getting rid of unwanted facial hair.

Threading involves twisting cotton threads into loops which are then rolled over areas of unwanted hair in order to pluck them out from the follicle.

It’s extremely precise. You can shape eyebrows perfectly as only hairs within the looped thread are removed. It’s also fast. Most treatments take between 10-20 minutes, depending on how much hair needs removing.

Threading does have its drawbacks, though. Some find it more painful than waxing, and there’s also the risk of infection if salon hygiene isn’t up to scratch.

Ultimately, whether you choose threading or another form of facial hair removal depends on your specific needs and preferences.

Bleaching Eyebrow Hair

For those seeking a more subtle way of removing eyebrow hair, bleaching is an option. Astonishingly, this method can be as effective as threading while providing a much less painful experience.

To put it simply, bleaching your eyebrows lightens the color and makes them virtually invisible!

So how does one go about bleaching their brows?

Firstly, you’ll need to purchase some bleach specifically designed for use on facial areas. Once you have everything ready, cleanse the area around your eyes with warm water before applying the product directly onto the hair.

Leave it in place until desired results are achieved – usually no longer than five minutes, depending on the strength of the solution. Then rinse off thoroughly with cold water.

Bleaching offers an easy and affordable way to temporarily remove unwanted eyebrow hairs and accentuate your features!


Laser Hair Removal For Eyebrow Hair

Laser hair removal uses concentrated light beams that are directed at individual follicles in order to destroy them and stop new growth from occurring. 

It comes with fewer side effects compared to other methods, such as waxing or threading, which can cause redness, irritation, and even scarring over time.

Pros And Cons Of Different Hair Removal Methods On Eyebrows

Tweezing:

Tweezing is one popular method of removing eyebrow hair. On the plus side, it’s fast and easy to do at home with minimal cost required. The downside? Tweezing isn’t ideal if you’re looking for long-term results, as hairs will grow back quickly after they are removed. Additionally, tweezing can cause breakage and damage to other surrounding hairs.

Shaving

Shaving is another option – but only in certain cases. For those who have thicker brows or don’t mind them being slightly shorter and fuller, shaving might work well for quick touch-ups between grooming appointments. While this method does not require any special tools aside from a razor blade, it runs the risk of cutting yourself, which could lead to infection or scarring.

Aftercare Tips For Removing Eyebrow Hair

Like all forms of grooming, the successful application of aftercare when removing eyebrow hair is essential for achieving and maintaining desired results.

The importance of thorough post-treatment care cannot be overstated. Following each session, the skin should be cleansed thoroughly with water and mild soap to remove any debris left behind by the hairs as well as residue from any products used during treatment.

This will help reduce irritation and prevent infection due to bacteria building up on the skin’s surface. Additionally, applying a light moisturizer or aloe vera gel can help soothe inflammation and replenish necessary moisture while calming the affected area.

Tips For Avoiding Ingrown Hairs

When it comes to eyebrow hair removal, there are a few simple tips you can follow in order to reduce the risk of developing ingrown hairs.

An ingrown hair occurs when a hair follicle fails to grow out from the skin and instead curls back around and grows underneath the surface. These can be uncomfortable and even painful.

The first step is to ensure that your eyebrows are well-groomed before attempting any type of hair removal.

Longer strands might become trapped beneath the skin, so keep them trimmed short using tweezers or an electric trimmer. Additionally, removing excess sebum with a gentle exfoliant will help prevent clogged pores which can contribute to ingrown hairs.

Alternatives To Traditional Hair Removal On The Eyebrows

For those who want longer-lasting results than traditional options provide, laser hair removal may be the answer.

Lasers target individual patches of unwanted hair while leaving surrounding areas untouched. They destroy the root of each strand so new ones won’t grow back as quickly over time – perfect if you’re looking for a semi-permanent solution.

Despite being slightly pricey up front, laser treatments require fewer sessions than most other forms of hair removal and offer excellent long-term value for money too!

Home Remedies For Hair Removal Of The Eyebrows

Sugaring

Starting simply, sugary solutions offer a straightforward way to soften strands before strimming away stray hairs. By combining caster sugar, lemon juice, and water into a paste-like mixture that sticks when spread onto the skin, you can create a gentle cleanser that removes unwanted fur while leaving lusciously full brows in its wake.

After applying the concoction and letting it sit for 10 minutes, use tweezers to take out the individual hairs. This will prevent irritation in delicate areas.

Homemade Depilatory Creams

For those looking for more intensive options, homemade depilatory creams may be just what you need. Creating these requires no more than mixing together honey and cornstarch until it forms a thick paste.

This remedy works by breaking down proteins within the hair follicles, which dissolves them from their roots – ideal if you’re searching for long-lasting results!

Eyebrow Shapes And Styles

The shape of one’s eyebrows can be a powerful statement, almost like writing your signature across your forehead. Every arch and curve conveys something unique about the individual who wears them – their personality and confidence shining through in each swipe of the tweezers.

From thick to thin, curved to straight, there are myriad ways to express yourself with this bold accessory!

When it comes to eyebrow shapes and styles, there is no “one-size-fits-all” solution. Everyone has different facial features that need to be taken into account when deciding on the perfect brows for you.

For example, if you have an angular face, then softer curves may suit better than sharp angles, while someone with rounder features might look great with strong lines and structure.

The best way to find out what works for you is by experimenting – try different looks until you find something that feels right!

Prevention And Maintenance Of Eyebrow Hair Removal

Surprisingly enough, there are many factors that play into how much eyebrow hair we grow and where it grows. From hormones to genetics – even environmental changes such as age or stress levels – all of these things affect our brow growth too!

So what can you do?

No matter which method you choose for managing unruly eyebrow hairs, the key is consistent upkeep and routine maintenance. With a little bit of effort now and then, you’ll soon find yourself rocking stunningly groomed brows like never before!

Conclusion

Learn how to remove Eyebrows permanently in the comforts of your home while reading this article. The methods included are safe, effective, and convenient to do.

Tips and Ways on How to Remove Eyebrow Hair at Home

Properly trimmed and shaped eyebrows improve your appearance. Attractive eyebrows can show your beauty, and they also define the shape of your face. There is nothing more charming than having these maintained and precisely-shaped. Unfortunately, there can be times that maintaining this facial feature is hard to do.

You might need guidance on how to keep well-maintained brows. This article will show you how to shape and maintain your eyebrows in the comforts of your home. Below is a list of ways and tips on how to remove unwanted hair strands. We will start with the basic things to know to maintain your eyebrows properly.

Permanently removing your eyebrow hair at home is unfortunately not achievable as it is complicated and requires professional intervention. It usually involves laser and multiple sessions for it to be removed permanently. Maintaining, shaping, and keep your eyebrow hairs tidy is the best thing to do as these typically grow much slower than your scalp hair.

Know Your Natural Eyebrow Shape

Usually, tweezing or waxing is the preferred method to remove eyebrow strands permanently. Start figuring out what hairs do you want to remove so that you do not overdo it. Knowing your eyebrow shape is important as it will determine where you will remove hair.

Eyebrow shapes come in oval, square, round, and long. These shapes depend on your face structure. An oval shape has shallow arches and soft angles best complemented with oval shapes. Square shapes have defined arches that try to balance square-shaped faces. Round shapes are lifted and angled that can lengthen your face. Long eyebrow shapes are flat, making your face look shorter.

How Much Eyebrow Hair Should You Remove

A golden rule is to remove as minimal as possible. We follow this rule because once you remove these hair strands, you cannot add them back. A good tip to do is use a brow pencil to draw a line under the eyebrows following your preferred shape. After drawing a line, you now have a guide for removing specific hair strands. It is important to know that the top of the brow is what makes its shape. Very minimal removal must be done, targeting only the obvious strands that the naked eye can see.

Using Scissors is a Big No

For professional stylists, they can use scissors to create beautiful and attractive eyebrows. For home eyebrow hair removal, it can be difficult and very tricky to do. If it is not done right, it can seriously alter the shape and look of your face. Tweezing is the preferred method for doing brow hair removal as it is easy and convenient. It also doesn’t require particular skills to be effective.

Tweezing Your Eyebrows at Home

Cleaning your Face and Following the Natural Shape

Before tweezing, you must thoroughly clean your face. Remember to follow your brow’s natural shape and only pluck under your eyebrows. Keep this tip in mind to overdo your tweezing and make your brows into a different shape.

Pull Your Skin and Make it Taut.

You should pull your skin, stretch it and make it taut before tweezing. It will make your hair removal at home easy and less painful.

Minimal Tweezing Is Recommended

Eyebrow hair maintenance at home must be minimal as there are no professionals present to guide you. You can make your brow show its full potential by keeping it clean and tidy. You have to clean up the bottom of the brow where you see obvious stray hairs.

Tweeze hairs that are out of place under the brows, and make sure that you are plucking the strands in the direction where it’s going in. It must be quick and properly directed to avoid having ingrown hairs. Because the top of the brows is critical to its natural arch shape, it is recommended that you do not touch this part.

Moisturizing After Tweezing

Moisturizing after tweezing can help minimize pain and redness. Facial oil moisturizers also help in the healing process of the hair follicle after tweezing. Moisturizing also nourishes the skin and keeps it clean and bacteria-free.

Waxing Your Eyebrows at Home

Waxing typically involves spreading a sticky and viscous substance over to an area to remove hairs. It is allowed to harden then it is quickly torn off. It is cheap, quick, and effective, but it might cause some pain. It can keep unwanted strands from growing for up to six to eight weeks. The hair grown can also be much finer than the one plucked before.

Use Hair Removal Waxing Kits for a Quick and Easy Procedure

Waxing kits are great for home use at it includes all that you need for hair removal. These kits also have instructions on how to apply the waxes. For home eyebrow hair removal, you can try kits that use hard or sugar wax. These are some examples that are gentle to the skin and are excellent for home-usage. These waxes are also easy to clean, which makes the hair removal process a breeze.

Before Waxing, Clean and Use Powder for Your Skin

Cleaning and powdering your face before using the waxing kit is strongly recommended. Washing your face removes any oil and dead skin buildup on your eyebrows. After cleaning, powdering your face helps prevent moisture from the skin, making sure that the wax grabs onto the hair strand easily.

Applying The Wax Correctly

Apply the wax strip in the same direction where the strand grows. If you are using hard wax, use a thick application, let it harden, use one hand to make the skin taut, and quickly tear the strip off.

Moisturize After Waxing

You should now moisturize your skin after waxing as the skin is inflamed from removing the hairs. You will notice a little redness on the skin, but it will gradually fade away. Moisturize the area properly so that it will rehydrate and heal properly.

DIY Home Tattoo Removal

Contents

Home Tattoo Removal Tips

This article will show you some home tattoo removal tips that make use of DIY methods to get rid of any unwanted tattoos.

Tattoos have always been considered a beloved form of body art. The art of tattooing doesn’t have any rules, and people can easily get tattooed over any of their desired body parts. People even tattoo themselves with a poke tattoo or a homemade tattoo.

Although getting a tattoo can cause a huge amount of pain, many people still go ahead with the decision to have a permanent drawing on their body.

Unfortunately, there are many people who get a permanent tattoo at the spur of the moment. Later on, it might not look like what they expected. Luckily, there are many tattoo removal options such as dermabrasion, cryosurgery, intense pulse light therapy, surgical tattoo removal, and laser treatment tattoo removal. However, these methods can be expensive and may leave unpleasant, permanent scarring afterward.

1 out of 5 people regrets having a tattoo.

The great news is you can practice DIY home tattoo removal using readily available ingredients and products at the comfort of your home. There will be no need for expensive treatments and medical procedures if you follow one of these home tattoo removal remedies.

Home Tattoo Removal Methods Using Natural Ingredients

#1 Salt

Salt naturally has an abrasive property that aids in permanent tattoo removal. The chlorine and sodium compound in the salt will penetrate deeply into your skin. Hence, it will break the ink structure from your skin. Salt is probably one of the cheapest but most effective methods for home tattoo removal.

Tip: Add a little amount of water along with your salt, then soak a sponge or towel in it. Then, rub the sponge on your tattoo for about 30 minutes to an hour. After the procedure, clean your skin using warm water. You may have to repeat this DIY tattoo removal procedure many times to see results.

#2 Honey

Usually, honey is used as a sweetener or an aid for sore throat. However, this sweet substance has far more uses than just a simple cure for sore throat and cough. Honey can be used as a natural and effective home tattoo removal ingredient, especially for tiny and light-colored tattoos.

Tip: Mix two tablespoons of yogurt, aloe vera, aloe vera juice, salt, and honey in a bowl until it turns into a thick paste. After you obtain the desired consistency, gently rub the mixture over your tattooed skin. After an hour, wash it all off with warm water.

Once again, you may have to repeat this DIY procedure several times to see results. Also, it is unlikely to work on large or dark tattoos but better with a small tattoo.

#3 Grinding Stones & Sand Powder

Grinding stones and sand power can be useful for all sorts of home tattoo removal and are efficient and often permanent. They will aid in the detachment of the tattoo ink from your skin. Usually, this will make the tattoo disappear once and for all.

Tip: Blend grinding stones and sand powder with an aloe vera gel. Mix them until they turn into a thick paste consistency. Gently rub it onto your unwanted tattoo until it fades away.

This DIY method can cause your skin to get very sore.

#4 Lemon

The juice, peel, and fruit of the lemon can be used in various unexpected ways. Lemon can also be used to lighten or remove undesirable tattoos permanently. This natural ingredient has a bleaching property because of the natural acids in it. These natural acids will aid in the lightening or removal of the tattoo ink on your skin. Moreover, using lemon juice can be healthy for your skin, as it sustains healthy skin and encourages the production of new skin cells.

Tip: Use salt along with lemon juice. Gently rub this mixture to your skin until the tattoo ink fades in the upper layer of your skin.

#5 Aloe Vera

Aloe vera is considered one of the most useful popular tropical plants with tons of benefits. It is commonly used in skin care products and treatments. However, not all people know that aloe vera can also aid in the removal of undesired tattoos, along with its skin-beautifying benefits.

Tip: The soothing property of aloe vera will help relieve your skin after your home tattoo removal in a similar way to yoghurt.

Home Tattoo Removal Using Creams Or Peels

There are a lot of creams and peels in the market that promises to remove unwanted tattoos. But before giving in to their marketing schemes, make sure to check the product’s ingredients first and look for ingredients such as retinol, glycolic acid, alpha hydroxy acid (AHA). An experienced tattoo artist may even use these potent ingredients to remove an eyebrow tattoo. Here are some products that may help you:

  • Lactic Acid 50% Gel Peel
  • Salicylic Acid 20% Gel Peel
  • Inked Up Tattoo Removal Cream
  • Wrecking Balm Tattoo Fade System
  • Splendora: 100% TCA Skin Peel Kit
  • LilyAna Naturals Retinol Cream Moisturizer
  • HerbalXpress LLC: Tattoo Removal Cream 3 Step Action
  • BioTOuch Color Lift Permanent Makeup Supplies Cosmetic Tattoo Solution

Home Tattoo Removal Using Make-up Products

With the rise of technologies, more and more cosmetic companies are coming up with better and innovative beauty products that can even cover up your tattoos temporarily. Although this is not permanent tattoo removal, this will be useful, especially for some formal and special occasions where you’d want to consider covering up your tattoos. For instance, if you’re having a formal business meeting, or if you’ll be meeting with your significant other’s parents for the first time and you think that tattoos would not create a positive experience.

If you’re considering covering those tattoos up, you’re in luck because concealing them is quite easy to do if you have the right foundation or concealer. Here are some products that may help you:

  • Dermacol Makeup Cover Waterproof Hypoallergenic with SPF 30
  • Dermablend Professional Leg & Body Makeup Foundation with SPF 25
  • Another Dermablend product: Professional Cover Creme Full Coverage Foundation with SPF 30
  • Dermablend Professional Quick-Fix Body Makeup Full Coverage Foundation Stick

In Conclusion

Not every person who wants their tattoo to be removed can afford expensive medical procedures and treatments such as laser removal. And perhaps, you’ve lost all hope to remove those unwanted tattoos on your body because you’re afraid that they will leave an ugly scar afterward. But you’re in luck because there are a lot of natural and cheap alternatives that will help you lighten or remove those tattoos in the comfort of your home.

Does Nair Face Cream Have Side Effects?

Have you ever used Nair Face Cream?

Many of us have, and with good reason. After all, it’s the number one selling facial hair removal cream in the United States.

But is this popular product really safe to use?

In this article, we’ll consider some of the potential risks associated with using Nair Face Cream and how they can affect your overall health.

Contents

What Is Nair Face Cream?

Nair Face Cream has some unique properties that make it stand out from other depilatory creams on the market. 

Nair Face Cream is designed specifically for use on delicate skin such as that on your face. It contains natural ingredients like aloe vera and vitamin E which help nourish and protect your skin while providing effective hair removal results in just minutes

The cream is also easy to apply; you simply spread a thin layer over the area of unwanted hair, wait three minutes then wipe away with a damp cloth or washcloth. Nair Face Cream will leave behind smooth, soft skin. 

How Does Nair Face Cream Work?

At the core of any Nair product is sodium hydroxide, which breaks down keratin proteins in the skin that hold follicles together. When these proteins are broken down, individual hairs can be easily removed from the skin without causing irritation or discomfort.

Additionally, Nair contains mineral oil and lanolin, two ingredients that help to reduce skin sensitivity during use and promote healing afterward.

What Are Common Side Effects Of Nair Face Cream?

It is possible for some users to get redness or irritation in the area where the cream has been applied. This can be especially true if the directions are not followed closely or if an allergic reaction occurs due to one of the ingredients in the formula. 

What Are The Risks Of Using Nair Face Cream?

First and foremost, there is always a risk of irritation when applying any topical creams. This may range from mild stinging or burning sensations at the site of application all the way up to more serious rashes and other skin reactions such as hives.

To reduce your chances of experiencing side effects:

  1. Make sure that you read the instructions carefully and follow them precisely;
  2. Test out a small patch on another area of skin first;
  3. Avoid contact with broken or inflamed skin.

Another concern is that overuse could lead to dryness or even discoloration of the skin, especially if used too frequently or left on for longer than recommended. If this happens, stop using immediately and switch to an alternative method of hair removal

What Ingredients Are Found In Nair Face Cream?

The main active ingredient in Nair face cream is sodium thioglycolate, which works to break down the proteins that make up body hair. It also contains several other ingredients such as mineral oil, stearyl alcohol, ceteth-20, water, glyceryl monostearate, propylene glycol, hydroxyethylcellulose and fragrance:

  • Sodium Thioglycolate – breaks down proteins in body hair
  • Mineral Oil – softens skin
  • Stearyl Alcohol – provides moisturizing properties
  • Ceteth-20 – helps distribute the product evenly on skin surface
  • Water – hydrates skin cell
  • Glyceryl Monostearate – acts as an emulsifier helping bind oils together with water
  • Propylene Glycol – humectant that helps keep moisture locked into the skin
  • Hydroxyethylcellulose – used to stabilize products and help them spread smoothly over the skin’s surface
  • Fragrance – adds scent to the lotion or cream

Are Harsh Chemicals Found In Nair Face Cream?

Nair face cream does not contain any known harsh or harmful chemicals; however, some milder irritants can be found in its list of ingredients.

Propylene glycol and sodium thioglycolate are two examples of these milder irritants. They work together to break down hair follicles so that they can be easily removed from the skin without causing too much discomfort or damage.

How Can I Avoid Allergic Reactions To Nair Face Cream?

To ensure that your skin retains its natural luster without any negative repercussions, here are a few tips to follow:

  • Always start by doing an allergy test on a small area of skin before applying the cream more liberally.
  • Take extra caution when using near sensitive areas like eyes or lips; never let them come into contact with the cream.
  • If irritation persists after use, discontinue use immediately and seek medical advice.

Rarer Side Effects

In some cases, people have experienced rarer side effects when removing body hair. These include a rash, swelling, or flaking skin. If you have sensitive or dry skin, you should avoid using Nair.

If you experience numbness, swelling, burning, or fever while using Nair, immediately discontinue use and contact a medical professional.

Finishing Off…

If you had skin irritation or another bad experience with Nair when removing facial hair, you might try another depilatory cream brand with a different formula.

Several facial hair removal creams on the market are formulated using natural ingredients, which might be a better option for sensitive skin. You may also want to try an unbranded hair removal cream or even a hair removal spray.

The vast majority of people who use Nair face cream don’t experience any adverse reaction – so if you do find yourself feeling uncomfortable after application, this doesn’t necessarily mean there’s anything wrong with your skin or the product itself.

However, it does mean that you need to carefully monitor your usage of it going forward.

Also worth noting is that certain individuals may find themselves more sensitive to the ingredients in Nair face cream than others – for example those with pre-existing conditions such as eczema or dermatitis might wish to consult their doctor before using it on their face.

How to Remove Peach Fuzz at Home
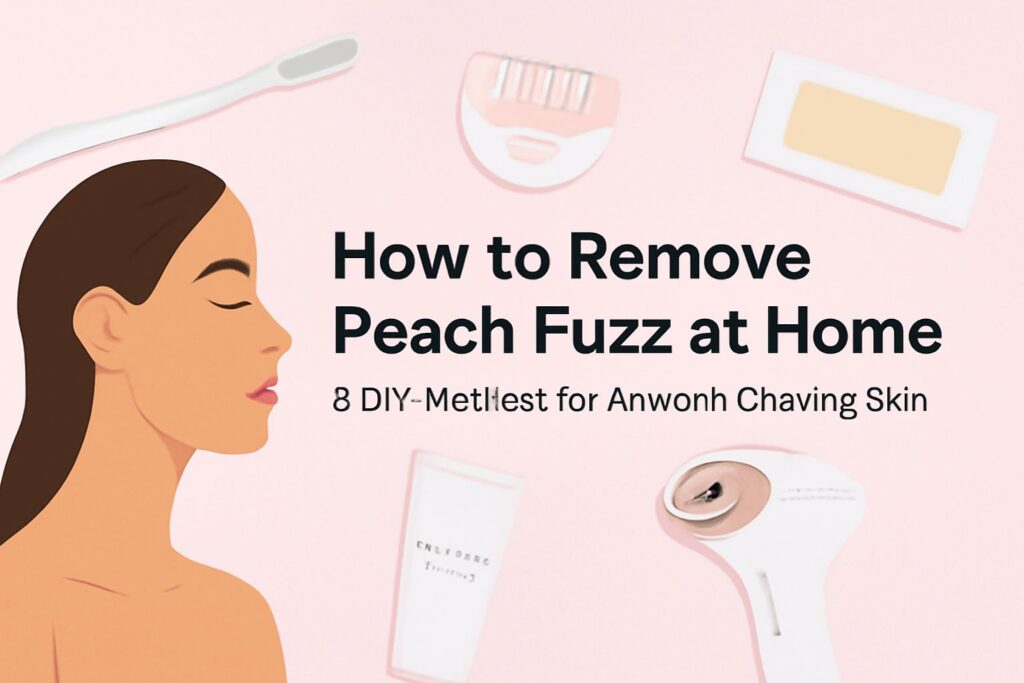
Contents

5 Effective DIY Options

All women have peach fuzz. It’s a fact! While the soft and fine hair on our faces and necks may be barely noticeable in some, it presents more of a problem to others. But we’re all looking for the most convenient way on how to remove peach fuzz – and these super-effective options can be done from the comfort of our own homes.

It’s important to note that excessive facial hair and vellus hair, while generally a result of genetics, maybe a sign of an underlying health issue such as a hormonal imbalance. So if your peach fuzz seems to present a bigger problem than most contend with, don’t hesitate to consult a health professional for a more holistic solution and better hair removal method. They will probably also be able to help you with your other body hair.

Disclaimer: in this world of magnifying mirrors and illuminating selfies, it’s easy to become obsessed with getting rid of your facial hair. However, don’t jump to any conclusions without researching what methods work best for your skin type, amount of hair, and history of skin conditions or medication. It may also be prudent to consult a dermatologist to map out the best plan of action for your at-home peach fuzz removal.

Waxing

Waxing may come to mind as the most obvious at-home peach fuzz remover. Although waxing is a non-permanent solution, it usually leaves skin smooth and stubble-free for 2-4 weeks. When applying wax at home, make sure to carefully read the instructions, as things can easily go wrong with hot wax. For example, overheating the wax can lead to unnecessary burns, rashes, and sensitivity.

When waxing at home, best practice includes carrying out a test patch with the wax on less obvious skin such as your arm rather than going straight for your upper lip! It’s also important to avoid waxing if you are using skin care products such as topical acne medication or antibiotics, as these tend to make your skin more tender.

Derma Planning

Derma planing is another DIY facial hair removal favorite that has taken off in recent years. The derma planning tool is made up of a dragged blade across the face at a 45-degree angle to remove peach fuzz and the outer skin layer made up of dead skin cells and blemishes. When derma planning, gently stretch your skin and pull the blade in light, feathery strokes across the region.

Dermaplaining leaves dull, damaged skin looking radiant, smooth, and youthful, and this exfoliation leads to increased effectiveness of most skin care products and makeup.

If your facial hair is curlier and coarser than average, be sure to use a single blade razor as multiple blades are more likely to cause ingrown hairs.

However, like all skincare methods, it’s best practice to research derma planning in full to determine if your peach fuzz calls for this type of removal. Most dermatologists will point out that improper methodology may lead to permanent scarring, sensitive skin. If you’re experiencing acne or cold sores, derma planning may only spread and exacerbate the infection.

Epilating

Although it’s a temporary solution, epilating leads to comparatively longer-lasting results than derma planning as it removes the peach fuzz hair at its roots. The epilator is an electronic device that works like several tweezers by tweezing the hair from your face and neck. For best results, glide the epilator in the same direction as hair growth.

Because of its nature, epilating can be painful, but it’s definitely the more comfortable option compared to waxing. Also, after a few weeks of epilating, you’ll notice that it has slowed down hair growth in those areas, which leads to increased effectiveness.

Some benefits of epilating include its ability to remove shorter, finer hairs than waxing can. It can also be used on wet or dry skin, making it one of the most convenient at-home facial hair removers for excess facial hair.

Intense Pulsed Light (IPL)

IPL is a type of photo facial therapy that uses a laser to target hair growth using laser hair removal. The laser works to convert light to heat, emitted in pulses as it passes over the face, killing the unwanted hair follicle and aiding hair removal.

It is normal to experience a pinching sensation, although this treatment is generally pain-free and a great at-home peach fuzz removal option.

A large part of IPL’s appeal is that it can lead to permanent hair removal; however, even IPL may call for infrequent maintenance.

Laser hair removal is also brilliant for leaving your skin younger and fresher, as it minimizes age spots, acne scars, and sun damage.

Depilatory Cream

A depilatory cream is a popular option for temporary peach fuzz removal that slows hair growth and leaves skin stubble-free for up to 4 days.

This quick and safe method using hair removal cream breaks down the hair proteins and dissolves the hair at its base, where it enters the skin. When the cream is gently wiped away using a damp cloth, the hairs break off. Unlike shaving, which leaves a blunt hair end, the dissolution causes a more tapered hair tip and, as a result, softer stubble.

However, there are risks to be considered before applying this product. Depilatory creams can be harsh on your skin, so make sure to test a patch of skin on your arm, following the instructions carefully. Be sure to wipe the cream off after the recommended period of time as leaving it on longer can lead to irritation – and who wants a red and painful face?

Additionally, if some stubble remains after treatment, it’s recommended to wait 48 hours before reapplying the depilatory cream for a second go.

It’s also important to use the facial depilatory cream, as the leg and underarm creams may be too strong for your facial skin. And for best results, make sure your hair is between stubble length and one-quarter inch before using this method.

When looking into any of these options to remove unwanted facial hair at home, it’s important always to follow the label’s instructions as improper methods may lead to more harm than help in the future. That said, these are the most effective DIY options for peach fuzz removal, and I’m sure you’ll fall in love with one of these methods, so good luck on your skincare journey!

Benefits of Using a Hair Removal Coil

Removing the hair on the face has been a practice for many years. Different people have different preferred methods of doing this depending on how one views the practice. Some like tweezing, while others use other methods like shaving, waxing, and more. Though all these methods give almost the same results, using the different tools and the experience differs.

Hair removal coil is a recent innovation, and it easy to use, and the results are satisfying. Even though there are several hair removal methods, including tweezing, waxing, shaving, and more, this tool is different. All those can eliminate hair, but the results may not be what you desire. However, hair removal coil gives more satisfying results and has many benefits, as stated here.

Contents

1. It is Effective

The hair removal coil is the most effective way of removing the hair from the root. Because of its effectiveness, you do not have to use any other additional removing agents like chemicals or waxing. You can keep your hair at the root with this effective method, which is also easy to use. It also ensures that the hair does not regrow very fast because it is taken from the root. With a few turns, the coil gently picks up every sticking hair from the hair follicle.

2. It is Flexible

Using the hair removal coil is not complicated, and you do not have to ask someone to help you remove your hair. All you need is the apparatus, and you can use it where you want. You can use it in the bathroom looking at the mirror-like many other methods, and you can also use it at the comfort of your couch watching a movie. Once you know how to use it, then you will realize you can use it almost anywhere. It is the quickest and fastest way to deal with your facial hair removal.

3. It is less painful

Many other hair removal methods are excruciating. When you use the hair removal coil, you will only feel a small pinch on the skin. It is nothing compared to what people go through when they are removing facial hair. Many people who use this method say that it is an amazing experience that cannot be compared to many other painful methods.

4. It Can Be Used on any Skin Type

Different people have different skin types, and some react against chemicals and other hair removal methods. The best thing about using this tool is that it is user-friendly and does not discriminate against any skin. Anyone who wants to remove the facial hair can use the coil without worrying about the reaction. The tool does not react on the skin, and therefore, it is the best to use on all skin types.

5. It is Practical and Easy to Carry

The hair removal coil is not bulky, and you can carry it by slipping it into your handbag and use it whenever you want. It also frees you from having to go and wait at a beauty therapy spar. You also do not have to keep paying money to have your hair removed by experts. You can do the job yourself and save your money for something else. Women spend a substantial amount of time waiting for their turn at a beauty therapy salon. But with this tool, you can do it at your home and spend the least time.

6. It can be used discreetly

Most hair removal methods need someone to do them for you. But with the hair removal coil, you do not have to let others know what you are doing. The reason is that you do not need to be assisted with the removal method. Since you can operate the tool alone, you can also remove your hair without other people knowing about it. You can also do it at home as your beauty routine without making it a major activity. Even the other members of the family do not have to know you are using the coil.

7. It is Easy to Clean

Once you buy the tool, you also know that you need to keep it clean. The best thing about this tool is easy to clean, and because it is stainless steel, you do not have to worry about your tool rusting. All you need is to wipe the tool with alcohol after use and then store it in a dry place.

How to Use the Hair Removal Coil

Knowing how to use the tool in the right way is as vital as understanding the benefits. If you think of buying the hair removal coil, here is how best you can use it. When you are using the coil, you need to hold it on both ends and bend it to make a u-shape. Hold the center arch facing upwards and place the coil flat against the face as you twist and follow these steps.

  • As you align the tip, ensure the coil’s plat side lies against the skin so that you can apply it to a larger area. When you want to use it for smaller parts, use the curved part and hold it on the skin, you are targeting, and you can cover more precise parts.
  • You will notice some arrows on the silver part of the handle on both sides. You need to rotate each of your hands as per the direction in which the arrow on that hand is pointing. That is the most effective way of making sure that you grab the hair from the root.
  • As you finish, use the smooth finish facial hair remover and move it away from the area repeating the process several times. You will soon discover the difference as you begin seeing the desired results. You can trust the tools to give you the best facial skin care for self-care at the comfort of your home.

Professional and Home Methods to Remove Skin Tags

Skin tags are small stems that protrude from your skin and can appear anywhere that has creases. Constant rubbing is the main factor that develops these skin marks.

There are different methods and equipment to remove skin tags.

You can treat the marks with the help of professionals. However, there are a wide variety of products on the market that you can apply at home.

Contents

Pros and cons of professional and home methods

Pros

  • Professional methods eliminate tags quickly, managing to remove them in a single session. On the other hand, homemade methods can take 3 weeks to 1 month for the tag to dry and fall off.
  • The treatments performed by professionals are effective, so you avoid paying extra if something were to go wrong with your home treatment.

Cons

  • Some devices on the market designed to remove warts, moles, or skin tags do not have clinical studies that demonstrate the safety of the equipment, causing burns and even mask cancer cases. Professional treatments are generally safe, reliable, and effective.
  • Professional treatments are usually more expensive than home treatment.
  • Home treatments or creams and devices on the market can generate unwanted marks, compared to professional treatment that does not leave marks on the patient’s skin.
  • Both methods should be taken care of after the tags are removed so that the affected area does not receive sun or rainwater.

Cause of the appearance of skin tags

  1. People with obesity have a high tendency for skin tags to appear due to the friction between the skin folds.
  2. Diabetes is another factor that causes the appearance of these tags.
  3. The friction produced by clothing and accessories also causes the presence of tags.
  4. They are associated with the aging of the individual. Tags are unlikely to be seen in children as it is common in adulthood and old age.
  5. Heredity is another cause for individuals to develop skin tags.
  6. There is the perianal label that is common in people with the disease known as Crohn’s.
  7. In the second trimester of pregnancy, women are very likely to develop skin marks.
  8. Hormonal change is a factor for the generation of tags.
  9. Ultraviolet radiation is a factor that can cause the appearance of tags.


How To Remove Skin Tags

The small bumps that we usually see in our body, especially when they protrude in the shape of a stem are known as skin tags, they can appear anywhere on the body and at any age.

• What are skin tags?

Skin tags or skin tags are small growths on the skin that tend to form from folds in the skin in different areas of the body where there is skin-to-skin contact.

These noncancerous growths are normally pink and brown, which are made up of a nucleus of fibers, ducts, nerve cells and fats covered by the epidermis.

They are located on the eyelids, under the breasts, armpits, groin, and neck in an irregular way, since they do not meet a standard of form, they are also not harmful to health and do not cause pain. However, the main reason they are removed is for cosmetic and aesthetic reasons.

• Why do skin tags appear?

The skin tags appear due to the hormonal change, in addition to the continuous contact of the skin folds. However, other causes give rise to the appearance of skin marks.

1. Collagen clusters and blood vessels that accumulate in areas where the skin is thickest.

2. Overweight people are the ideal candidates for the formation of labels due to the number of folds; therefore the constant friction between the folds gives rise to these skin marks.

3. Hyperinsulinemia

4. People suffering from diabetes and insulin resistance

5. Those who carry human papillomavirus disease or HPV

6. Changes in estrogen and progesterone related to hormonal imbalance are a cause of the appearance of marks on the skin.

7. Finally, pregnant women are prone to the appearance of skin tags by hormonal change.

• Size of skin tags

The skin tag varies in size from its appearance, first, they are as small as the end of an almost imperceptible pin, however when they develop their size can vary between 3 mm and 5 cm.

• Causes to remove skin tags

The main decision to remove skin tags, even though they do not cause any pain, is because of the aesthetics of the skin. Many people decide to remove them because they cannot bear the presence of these small skin marks that can be a point of distraction for other people.

In addition to the need to eliminate them by constant rubbing with necklaces, clothing, or accessories that cause discomfort, however, it often happens that sudden movements or constant scratching can weaken the label and cause itching and burning from the wound that is generated.

• Skin tag removal

To remove a skin tag you can go to a dermatologist to carry out the corresponding treatment or you can remove it with the help of a friend or family member at home. For this, we divide into two sections the removal of skin tags in professional and homemade methods, according to your perception and availability you will carry out the method that best suits you.

1. Professional methods

a) Cauterization: this procedure consists of applying heat to the label using electrolysis to eliminate it in a single procedure.

b) Ligation: This method consists of interrupting the blood supply to the skin tag and in this way it falls off after a few days.

c) Cryosurgery: the application of liquid nitrogen is an infallible method to remove the tag, since it freezes the tag with the help of a probe, managing to remove it.

d) Excision: this is the procedure used mainly to remove the labels since with the help of a scalpel the stem that protrudes from the skin is cut.

2. Home methods or natural skin tag removal

There are different treatments that you can do at home, even products and kits for removing skin tags are already on sale.

a) Tommy Timmy Smoother Skin Laser: The Tommy Timmy laser is the ideal tool to remove very annoying and sometimes unpleasant hair, skin tags, moles, and warts.

It is one of the main options since, with the help of the laser and the heat it generates; it can effectively eliminate any unwanted skin marks.

b) Dental floss: with the help of a previously disinfected dental floss, proceed to wrap and adjust the label, you must adjust the label every day until it falls and it can take 10 days until this mark falls.

Remember to disinfect the area, hands, and thread to avoid infection, this process is similar to ligation except that you do it at home.

c) Nail polish: applying the transparent nail polish on the label allows the label to be reduced and dried until it is removed, for this you must clean the area very well with soap and water and remove moisture with a towel, then apply a layer of the product and let it dry, this step applies until the label disappears.

d) Creams: different sales platforms offer the user creams to remove the labels, which can take up to 3 weeks to notice the results. The procedure that is carried out is to disinfect the area with alcohol and apply the cream that generates an itchy sensation.

e) Tea tree oil: tree oil has the function of drying the skin tag, so you should apply tea tree oil three times a day on a cotton ball for 10 minutes; note that this oil should not be applied to the eyes due to its degree of irritability.

f) Apple cider vinegar: apple cider vinegar has different uses for health and one of them is to remove skin tags, in this way and with the help of cotton, soak the cotton and apply it for 10 minutes to the area affected.

This procedure is carried out two or three times a day, taking into account that if you notice skin irritation you should stop using it.

g) Iodine: to use this treatment you must be careful with the surrounding skin, so you should apply petroleum jelly to the skin to protect it. Then with the help of a swab, apply the iodine only to the skin tag and cover it with a bandage until the product dries.

Keep in mind that products like iodine, apple cider vinegar, and tea tree oil should be applied until the label falls off, so patience and consistency are essential for results.

h) Dandelion: The milky juice of dandelion is effective in drying the skin tag. Just apply the juice on the label with a cotton pad three times a day until it disappears.

It is remarkable the time it takes to completely remove a skin tag, in which professional treatments are faster and safer compared to home methods; however it is the patient who decides which method to apply to improve their appearance and comfort. Aftercare is essential to heal the wound, you should clean and apply creams that heal the affected area, and above all avoid sunbathing for at least a week until the wound is completely healed.

Skin Tag on Eyelash Line

Around 25% of the population suffer from skin tags on different parts of their body. They are usually harmless but are esthetically unappealing and can affect self-esteem. If you currently have a skin tag and want to get rid of it or want to know more information about them, this article will give you all of the information you need.

Contents

What Is A Skin Tag?

Skin tags are small growths of skin that form on the surface and hang from a thin stalk. A skin tag can have the same color or be darker than your skin tone. They consist of collagen and blood vessels surrounded by a covering of skin.

Skin tags can appear on different body parts such as the armpits, neck, around genitals, under the breasts, and the anus. Here, we will only focus on the skin tags that grow on the eyelids.

Skin tags in the eyelid aren’t dangerous, and they can’t cause serious health problems or turn cancerous. They are NOT a sign of eyelid cancer or skin cancer. However, they can be annoying, cause discomfort if you rub your eyelid, and affect your appearance.

Fortunately for us, there are several ways for skin tag removal.

What Causes Skin Tags?

A skin tag appears due to excess cell production in the skin, also known as excess skin. These factors can make them more likely to appear:

Genetics: For unknown reasons, some people are more likely to have skin tags than others. So if your parents have them, you are more likely to have them too. So, you can blame your parents!

Friction: it could be skin rubbing against jewelry, clothing, or skin rubbing against other skin. The area around your eyelids, such as the lash line, is commonly affected by friction every time we smile, blink, or look around. It can help if you try and minimize excess skin as it can lead to sensitive skin.

Hormonal fluctuations: A study performed by Iman Budi Putra of the faculty of dermatology from the University Sumatera Utara in Indonesia. It revealed a strong correlation between the levels of leptin, “the satiety hormone,” and skin tags’ appearance. Another connected hormone is estrogen. When the levels of these hormones drop, your skin is more prone to developing skin tags.

Pregnancy: As discussed above, any situation that causes hormonal fluctuations (such as pregnancy) can cause skin tags. The good thing is that it tends to disappear after the pregnancy period.

Obesity: Weight gain can increase skin friction amongst skin folds and also cause hormonal imbalances.

Insulin resistance and diabetes type 2: The consultant endocrinologist Dr. Mark Vanderpump states that skin tags could be an early sign of diabetes type 2 or insulin resistance. Hence, if you notice that you have too many skin tags on your eyelash line, it is best to consult a doctor.

Steroids: The illegal use of steroids can result in skin tags’ appearance in your eyelash line.

Aging: As we age, our skin gets thinner, especially around our eyes, making it more susceptible to changes such as skin tags. The skin becomes weaker and less elastic, and the skin starts to produce more oil. Due to these changes, skin tags affect older adults more.

Papillomavirus: A skin tag on the eyelid can appear due to viral infections.

Identifying A Skin Tag

There are different types of bumps, such as seborrheic keratosis, that can appear on your upper eyelid or lower eyelid. It may be a challenge to know when you have a skin tag, but here are some key factors to consider:

  • Usually, a skin tag on the eye will have a small size, no more than 5 mm.
  • They are not contagious like a wart.
  • You can pinch or apply pressure to them, and they won’t hurt.
  • Skin tags feel smooth and soft, just like the skin around them. You may notice some changes in textures if they become irritated. It could be painful to have this skin growth.
  • They are peduncular, and they form on the eyelash line on a narrow stalk.

Treatment And Skin Tag Removal Options

The eyelid is such a delicate area and easily exposed to others. Your eyes are the first thing people notice most of the time, so a skin tag can easily affect your appearance.

Sometimes the skin tags will fall on their own, but other times they can become irritated or even grow too large, which will obscure your vision. This will require treatment for your eyelid. But don’t worry, here are the best ways to get rid of skin tags without serious surgery:

Home Remedies

Some people claim that apple cider vinegar and tea tree oil help skin tag removal. But the effectiveness of this method has never been proven.

Cryotherapy

This procedure uses extreme cold to freeze off the skin tags. The doctor will pinch the patient’s skin with a cotton swab that is soaked in liquid nitrogen to freeze the skin tags. They will fall off within 10 days.

Scissor Excision

The doctor will use a small pair of sterile scissors or a scalpel to cut the small skin tag off your eyelid. It works by cutting the thin stalk that attaches the skin tag to the eyelid. It is the fastest way to get rid of skin tags.

Cauterization

It includes numbing the are and burning off the eyelash line’s skin tags by using a laser device. It is effective, and the burning prevents any bleeding.

Ligation

This procedure works by using a fine string-like material to tie off the skin tag and deprive it of oxygen. It is not often used on the eyelid due to the sensitive area.

How To Prevent Skin Tags In Your Eyelash Line

The eyelash line is the closest to the eyes, so it is important to take care of it and do anything you can to prevent those annoying skin tags from appearing. Although you can’t change your genetics, there are some things you can do to avoid their appearance.

  • Keep a healthy weight, practice some exercise, and have a healthy diet. This will also prevent conditions like diabetes type 2.
  • If you have PCO’s, insulin resistance, or another condition that affects your hormone balance, consult your doctor.
  • Avoid rubbing your eyelids, but be gentle to them.

Final Thoughts

Skin tags in the eyelash line are common and, most of the time, don’t cause any problem. Still, if you have one affecting your self-esteem, causing discomfort, or obscuring your vision, you should go to see a doctor. Many safe and effective treatment options will help you.

Does Vaseline Get Rid of Skin Tags?

Have you ever noticed those small, flesh-colored growths on your skin and wondered what they were?

Skin tags are a common nuisance that affect many people.

They can be unsightly and frustrating to deal with, but does Vaseline get rid of them?

For many years, vaseline has been used as an all-purpose ointment for dry skin and minor cuts or scrapes. But is this time-honored remedy up to the task of removing pesky skin tags?

In this article, we’ll explore if there’s any scientific evidence showing if this popular home remedy is effective for treating skin tags once and for all.

Contents

What Are Skin Tags?

As the saying goes, knowledge is power. Skin tags are small growths that often appear on the skin and can vary in size from a few millimeters to several centimeters. They typically look like flesh-colored or slightly darker flaps of tissue that hang off the body by a thin stalk.

Skin tags generally occur in areas where friction occurs such as underarms, neck, eyelids, upper chest, and groin folds. They’re likely caused by genetics, hormones, aging, obesity or irritation due to clothing rubbing against the skin repeatedly. Though they may be unsightly for some people, skin tags are usually harmless and don’t require any medical attention unless they become irritated or inflamed.

They can be removed through various methods including freezing with liquid nitrogen or cutting them off with scissors. In either case it’s best to consult your doctor beforehand so you know what to expect after removal and how to care for your skin afterwards.

Treatment Options For Skin Tags

The ever-present skin tag is like a bane that never goes away. It’s an unwelcome visitor, with its small size and shape making it difficult to ignore. But while we may be tempted to reach for Vaseline or tweezers, these are not good choices when dealing with skin tags.

Is Vaseline An Effective Treatment For Skin Tags?

Like a beacon of hope for those with skin tags, vaseline may be the answer to all our prayers. Could this common household item be an effective treatment?

To investigate if vaseline can help treat skin tags, it is important to consider its healing properties first. Vaseline is known for being a powerful moisturizer that helps lock moisture into the skin, but also has antibacterial elements which inhibit infection from developing around any open wound or sore.

This means that when used on skin tags, it can reduce redness and inflammation while keeping them clean and safe from further damage.

Given these qualities, using vaseline as part of your skincare routine could potentially provide relief from the discomfort associated with having skin tags.

The protective film created by the ointment helps keep the area hydrated and prevents drying out which can irritate the delicate tissue surrounding the tag.

In addition, vaseline’s natural anti-inflammatory properties can soothe itching and irritation caused by dryness or chafing against clothing.

So while there is no definitive answer as to whether or not applying vaseline on skin tags will result in complete removal, its healing and protective benefits certainly make it worth trying as part of your regular skincare regimen.

Pros And Cons Of Using Vaseline For Skin Tags

As the old adage goes, when it comes to skin tags an ounce of prevention is worth a pound of cure – but what about using Vaseline for treating existing skin tags?

Using Vaseline as a treatment for existing skin tags may seem like an attractive option, as it’s widely available and inexpensive – but should you go down that route?

Covering your skin tag in petroleum jelly presents certain risks due to its occlusive nature; not only does this create the perfect environment for bacteria growth, but it also prevents air circulation around the affected area, which could lead to infection if left untreated.

Whichever approach you decide upon, always ensure that you understand all possible outcomes before proceeding – after all, knowledge really is power!

How To Use Vaseline For Skin Tags

Time to get your Vaseline ready, ’cause we’re about to learn how to use it for skin tags!

Now, if you’re thinking this is a long-winded way of saying “just smother it with the stuff” – hold your horses. There are some important things to consider before you start slathering up.

Let’s take an unconventional approach and look at this from the perspective of an old sailor (ahoy!). If you want to remove those pesky skin tags permanently, then maybe it’s best that Vaseline isn’t involved. Because while it may help soothe and moisturize the area in question, it won’t actually rid your body of them.

But don’t despair! After all, there still might be a use for that jar of Vaseline tucked away in your bathroom cabinet. Applying a thin layer directly onto the affected area will keep skin from drying out and protect against infection or further irritation.

It’s always wise to check with your dermatologist first but Vaseline is definitely worth trying as a short-term solution for reducing discomfort related to skin tags.

Common Side Effects Of Using Vaseline For Skin Tags

Using vaseline for skin tags is like a roller coaster ride – it can be exciting and helpful, but there are some potential side effects to consider. Common side effects of using this method may include redness, itching, or burning sensations around the area where vaseline has been applied. While these symptoms should eventually subside on their own, if they persist longer than expected it would be best to contact a healthcare professional.

In terms of more serious complications from applying vaseline to skin tags, there is always a risk that an infection could occur due to bacteria entering the wound site; however, this can usually be avoided by cleaning the area before and after application with soap or rubbing alcohol.

Additionally, while not common, in rare cases excessive inflammation could lead to further tissue damage if left untreated.

Therefore it’s important to keep track of any changes you notice when using vaseline on your skin tags and reach out for help if needed. It’s also wise to speak with a qualified doctor or dermatologist beforehand so they can advise on the safest course of action based on your individual case.

Summary And Takeaways

It is often said that knowledge is power, and this certainly rings true when it comes to treating skin tags. Knowing the facts about how they form and the treatments available can make all the difference in getting rid of them.

The first step is understanding that there are various methods for dealing with skin tags – from simple home remedies like using Vaseline or tea tree oil, to surgical removal by a doctor.

Depending on the size and location of the tag, different techniques may be required. While most treatments will cause some level of discomfort, it’s important to remember that this should only be temporary.

Conclusion

In conclusion, skin tags are a common and harmless condition that can be treated with various methods. While some treatments may require medical intervention, there is no evidence to support the use of Vaseline for removing or preventing skin tags. People should speak with their doctor about what treatment options might be best for them based on their individual needs and preferences.